Create Custom Capture Fields
The ability to create custom capture fields is limited to Manager-level accounts, and is done through the Admin Console. Add categories, custom fields, and configure the view for Custom Capture tab all from this location.
The following types of fields can be created:
- Currency: Currency shows as US$
- Date: Date fields only accept dates. The calendar icon will be visible to select a date in calendar mode
- Drop Down: Create a list of options for the user to select from. You can choose single select or multi-select drop down types, add values for use in formulas, and set default options for automatic entry into your opportunities
- Formula: Insert a math formula using the available currency and numeric fields. Results will update automatically if all fields have values within the opportunity
- Grid (Table): Create a table format with column headers. Rows can be added and deleted within each opportunity
- Memo: Used for longer text. If response will be more than a sentence, use this field type
- Numeric: General number field
- Percent: Enter a whole number value representing a percentage. Will be calculated as percent in formulas
- Text Field: Shorter text field; limit to use when response will be a sentence or similar
- Web Link: Enter your URL to include links to other resources in your opportunity
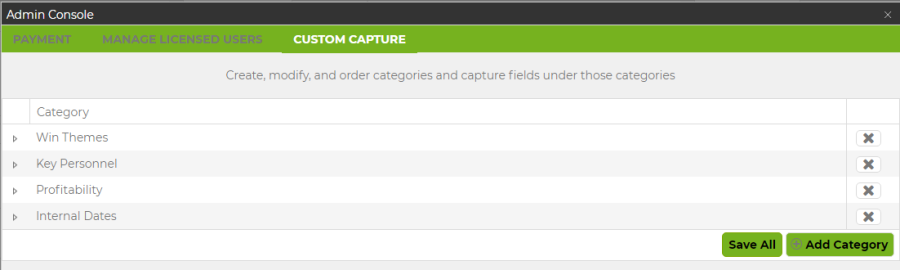
- In the Admin Console, select the Custom Capture Tab.

- Click
 to add a new category, or click to select an existing category.
- For a new category, a new text field will appear on the page. Enter the name for the category, and click return to save the category.

- Click the small triangle next to the category name to open the category and start adding fields.

- For a new category, a new text field will appear on the page. Enter the name for the category, and click return to save the category.
- Click
 to add a new field in the category.
- Enter a name for the field
- If you add a description, the description will show as a tool tip when users mouse over the field name in the Custom Capture Tab.
- Select the Field Type.
- For Drop Down, Formula, and Grid options, you will now see a
 next to the Field Type. Click this button to add field selection options. For each of these field types, you will now get a screen designed to enter the needed elements for that field type. Click here for more instructions on these field types.
 - Click anywhere on the row for this new field, and you can drag and drop it into the column of your choice, or into a new category if you want it to be displayed in a different section in the Custom Capture Tab.
- If you select Column 1 for all of the fields in a category, the view for that category in the opportunity will show just one long column.
- If you only put new fields in Columns 1 and 2, only two columns will show in the view.
- If you put anything in Column 3, all 3 columns will show in the view, even if column 1 and/or 2 is empty.
- For Drop Down, Formula, and Grid options, you will now see a
- Continue adding new categories and fields and configuring the view until you have it right.
- Close the Admin Console. Your configuration is automatically saved, and the new fields can be see in the Custom Capture tab for each opportunity, as well as in the Pipeline options.
- If you hit the max number of fields allowed with your subscription, you will get a message indicating that you are at the limit. Contact Sales to increase your number of fields if necessary.